
Downloadable Slippers (Zori)
In traditional Japanese dojo, zori are slippers that are worn when walking to or from the tatami, or mat. This keeps the mat — into which your face will be pressed — clean.
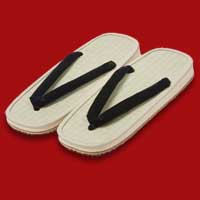
Zori, not downloadable
(actually, you can buy these from
Nine Circles)

Downloaded zori
Forgetting your zori leads to a shameful breach of etiquette: Walking barefoot is forbidden, and clumping up to the edge of the mat in your boots or high-heels is vulgar. What to do? Fudebakudo, of course, has the answer with the downloadable zori — brought to you by the combined technologies of origami and the internet.
You will need:
- downloaded instructions and template
- printer and paper
- photocopier for enlarging
- scissors (to cut out the square)
- stapler or tape (there's a little fix right at the end)
Step 1: Download
Download the zori and print them out.
Step 2: Cut Out at Correct Size
The standard size of the template is for a small child or tiny Zen master. If your feet are bigger you will need to use your printer or a photocopier to increase the size of the basic square template. Cut around the square as accurately as possible.
| Shoe Size | Required template size | ||||
|---|---|---|---|---|---|
| GB | Japan | Europe | US | Zori square (cm) | Enlarge* % |
| 3 | 22 | 35.5 | 4 | 52 x 52 | 260% |
| 4 | 23 | 37 | 5 | 54 x 54 | 270% |
| 5 | 24 | 38 | 6 | 56 x 56 | 280% |
| 6 | 25 | 39 | 7 | 57 x 57 | 285% |
| 7 | 26 | 41 | 8 | 58 x 58 | 290% |
| 8 | 27.5 | 43 | 9 | 61 x 61 | 305% |
| 9½ | 28.5 | 44 | 10½ | 62 x 62 | 310% |
| 10½ | 29.5 | 45 | 11½ | 63 x 63 | 315% |
| 11½ | 30.5 | 46.5 | 12½ | 65 x 65 | 325% |
* Note: Enlarge % shows the magnification required if you are enlarging the square template (20cm x 20cm) that is provided in the PDF file.
Step 3: Follow the printed instructions
You'll need to use the template & instructions (~450Kb PDF) you have downloaded.
Start with the paper face-down so you can't see the split logo and dark triangles. But peek underneath to check that the logo (and hence the paper) is the right way up. Fold the paper as shown.

Preliminary creasing
When you've done that, unfold the paper completely. It might seem like all you've done is crease the paper, but trust us: if you don't get this bit right, the whole thing won't work. That's origami for you.
Make sure you have the paper arranged the right way because this is where you start folding. Find the top corner and fold it down so the fold line goes through the two points as shown. When you fold the top half back on the centre line, the top corner sticks above it.
Fold top behind and up
This is the tricky bit. Look at the printed instructions. Look at the paper. Look at your fingers. Fold the left and right points down to the bottom (you can do one side at a time). If you got the preparatory creasing right, you'll get a neat diamond shape on the front. Otherwise you won't.

Tricky bit
Reverse fold by tucking in the sticky-out bits to form a neat diamond shape.
Reverse fold the sticky-out bits
Take the bottom points and fold them out as shown. These are the straps. Once you've folded them out, fold them over on themselves (to make the straps thinner).
Fold out the straps
Now turn the paper over and fold the top and the bottom down — you're looking at the sole of the zori. There's a pocket across the middle, into which you need to tuck the pointy ends you've just folded down. Fold in at the edges, next to where the straps join, to make the lozenge-shape of the zori.
Fold edges in to make sole
Turn the zori back over and finish with the straps.
Fold straps and voila desu!
Strictly speaking, origami ends when stapling begins. But if you were being traditional you wouldn't have forgotten your zori in the first place. So secure the straps to the front of the slipper with a staple (you can use sticky tape instead). You can also fix the join underneath the sole if it's not secure.
Walk to the mat and step out of your authentic, stylish, zori.